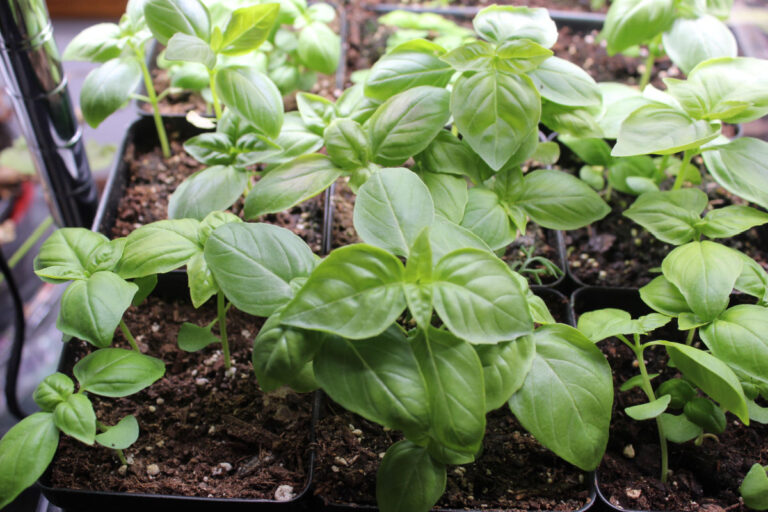
How to Grow Basil from Cuttings (easy beginner method)
If you already have one basil plant, you can turn it into several. Even if it’s one you bought from the grocery store!
Growing basil from cuttings is one of the simplest ways to multiply your plants without buying seeds or starting trays. If you’ve never propagated a plant before, this is a great place to begin.
This method works indoors, outdoors, in summer, and even with grocery store basil.
And yes – it really is that easy.
Looking for info on how to start basil from seed? Here is my Growing Basil from Seed post.
What You Need
The Simple Version
- A healthy basil plant
- Clean scissors or pruning snips
- A small glass or jar
- Room temperature water
That’s it.
Optional Upgrade
- Small pot with drainage
- Quality potting mix (not garden soil)
- Bright sunny window or grow light
You do not need a warming mat, humidity dome, or special setup for this method.
Why Growing Basil from Cuttings Works
Basil roots very easily from the nodes along its stem.
A node is the small bump where leaves grow out. When placed in water, those nodes naturally produce roots. You’re simply encouraging the plant to do what it already wants to do.
This creates a clone of your original plant, meaning:
- Same flavor
- Same leaf size
- Same growth habit
If you love the basil you already have, this guarantees more of the same.
Step-by-Step Instructions
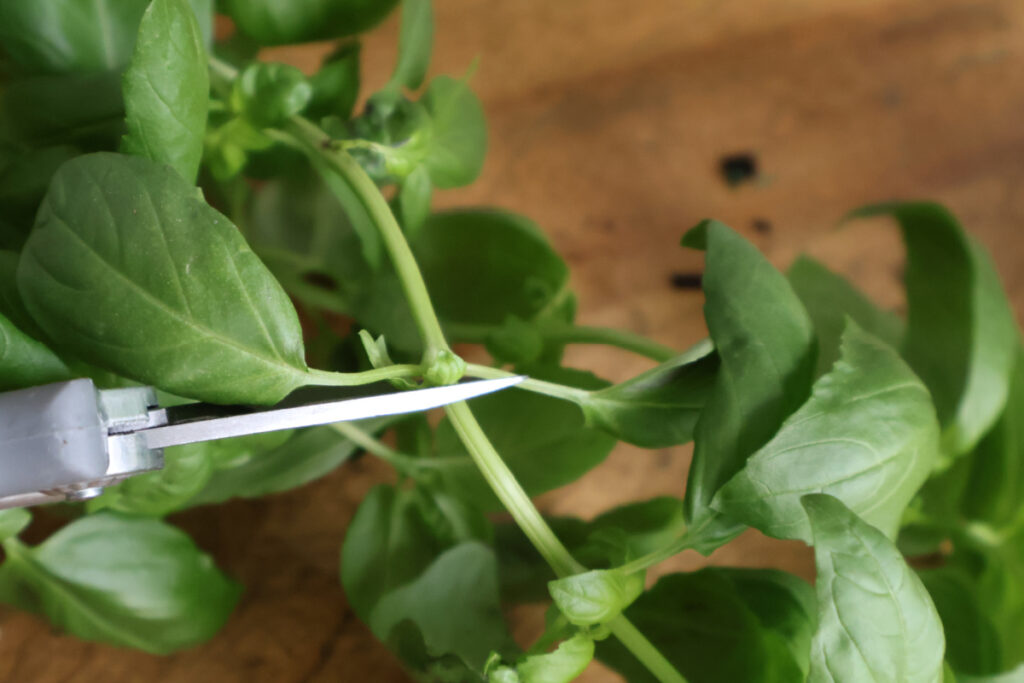
Step 1 – Choose the Right Stem
Select a healthy, green stem that:
- Is about 4 to 6 inches long
- Has multiple sets of leaves
- Has not started flowering
Avoid woody or blooming stems. Once basil flowers, energy shifts away from leaf production.
Cut just above a leaf node.
Step 2 – Remove Lower Leaves
Remove the leaves from the lower half of the stem.
Only the top 2 to 4 leaves should remain. Any leaves sitting in water will rot and cause problems.
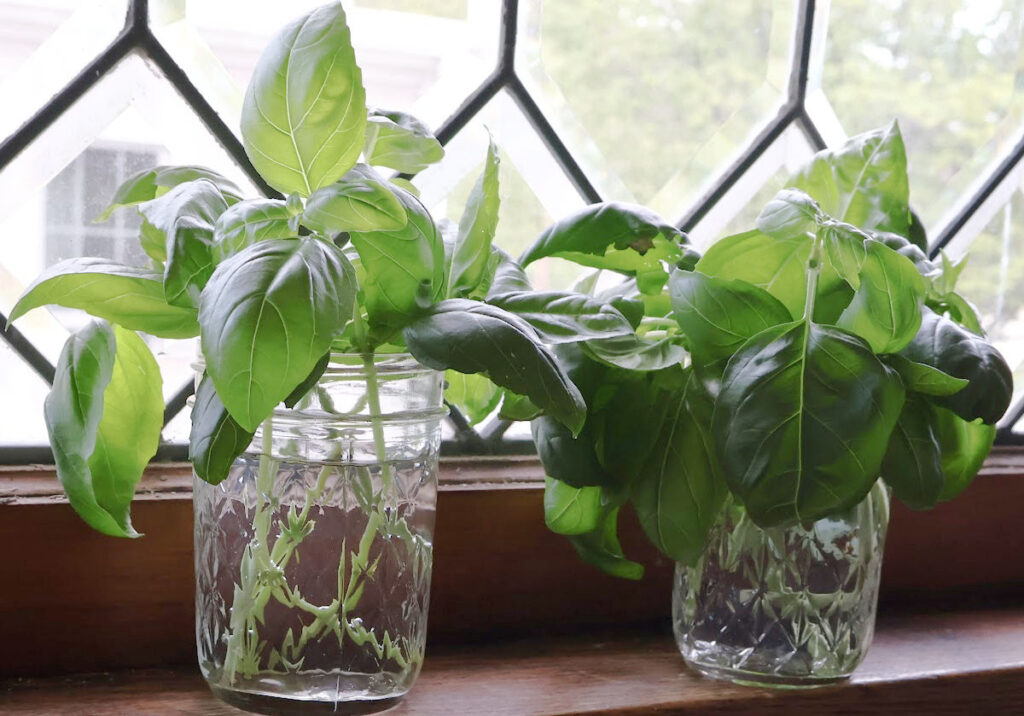
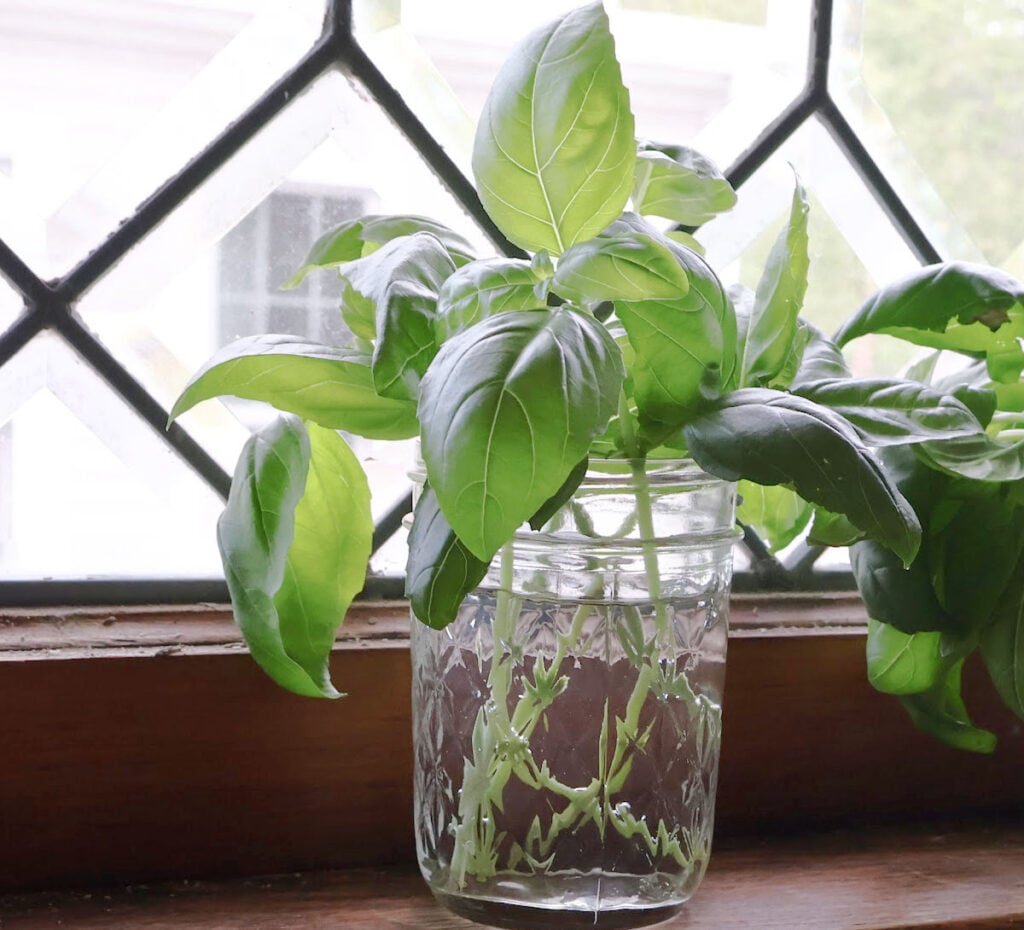
Step 3 – Place in Water
Place the cutting in a small jar of water so the bottom nodes are submerged.
Keep the leaves above the water line.
Set the jar in bright indirect light. A sunny windowsill works well.
Change the water every 2 to 3 days.
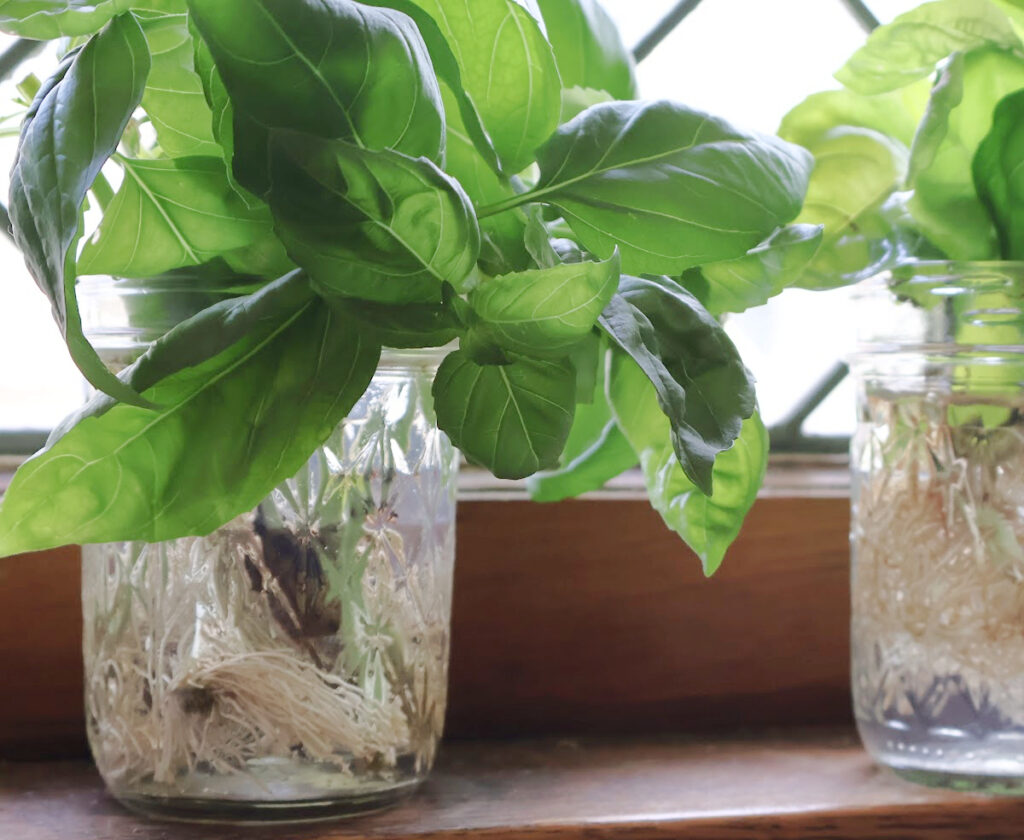
Timeline – What to Expect
- Days 1 to 3: Stem stays firm, no visible change
- Days 5 to 7: Small white root nubs begin forming
- Days 7 to 14: Roots grow longer and more established
Once roots reach about 1 inch long, the cutting is ready to move to soil. These roots are a little big. It’s the difference of a few days : ).
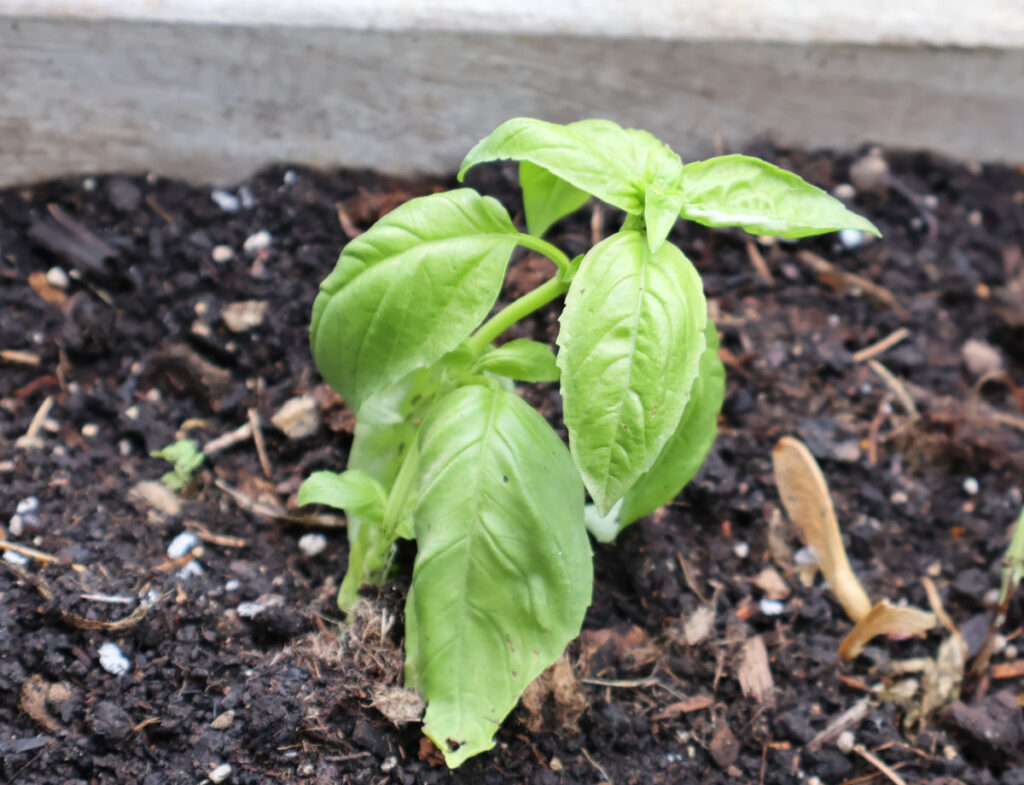
Step 4 – Transplant to Soil
Fill a small pot with light potting mix.
Make a hole and gently place the rooted cutting inside. Firm the soil around it and water thoroughly.
Keep soil lightly moist during the first week while it adjusts.
After that, treat it like any basil plant.
Or, if planting in the garden, just plant it to the same depth as it was in the pot.
Light Requirements
Basil needs strong light to stay compact.
Indoors:
- 6 or more hours of bright light
- Or use a basic grow light
Outdoors:
- Full sun is ideal
If your plant becomes tall and leggy, it needs more light.
Troubleshooting FAQs
Change water more often.
The cutting is rotting. If you have a longer stem, cut the bad part off. If you can’t, you may have to start with a fresh stem.
The plant is suffering from mild transplant shock. Keep the soil moist and give it a few days to recover.
The plant needs more light.
Can You Root Basil Directly in Soil?
Yes.
Insert cuttings directly into moist potting mix and keep soil consistently damp for 2 to 4 weeks.
However, the water method is more beginner-friendly because you can see the roots forming.
What Happens Next?
Once established, you can:
- Move basil outdoors after frost
- Plant several cuttings together for a fuller container
- Keep one plant indoors year-round
- Take more cuttings and repeat the process
Make sure to harden the plant off. Meaning, put it in the sun for a short period on day 1, longer on day 2 etc.
Looking for more easy to grow kitchen garden herbs and vegetables? Try these –